Xara Web Designer is a powerful web design software that allows users to create professional-quality websites without the need for coding. Whether you are a beginner or an experienced designer, Xara Web Designer provides an intuitive and user-friendly interface that makes designing websites easy and enjoyable. In this article, we will provide a step-by-step guide on how to use Xara Web Designer to create your own website.
Step 1: Install Xara Web Designer
The first step in using Xara Web Designer is to install the software on your computer. You can purchase and download Xara Web Designer from the official Xara website. Once you have downloaded the software, follow the installation instructions to complete the installation process.
Step 2: Choose a Template
Once you have installed Xara Web Designer, open the software and select “New Document” from the welcome screen. This will bring up a variety of website templates that you can choose from. Browse through the templates and select one that best suits your needs.
Step 3: Customize Your Template
After selecting a template, you can customize it to your liking using the various tools and features provided by Xara Web Designer. For example, you can change the layout of the page, add or remove elements such as text boxes and images, and adjust the color scheme to match your branding.
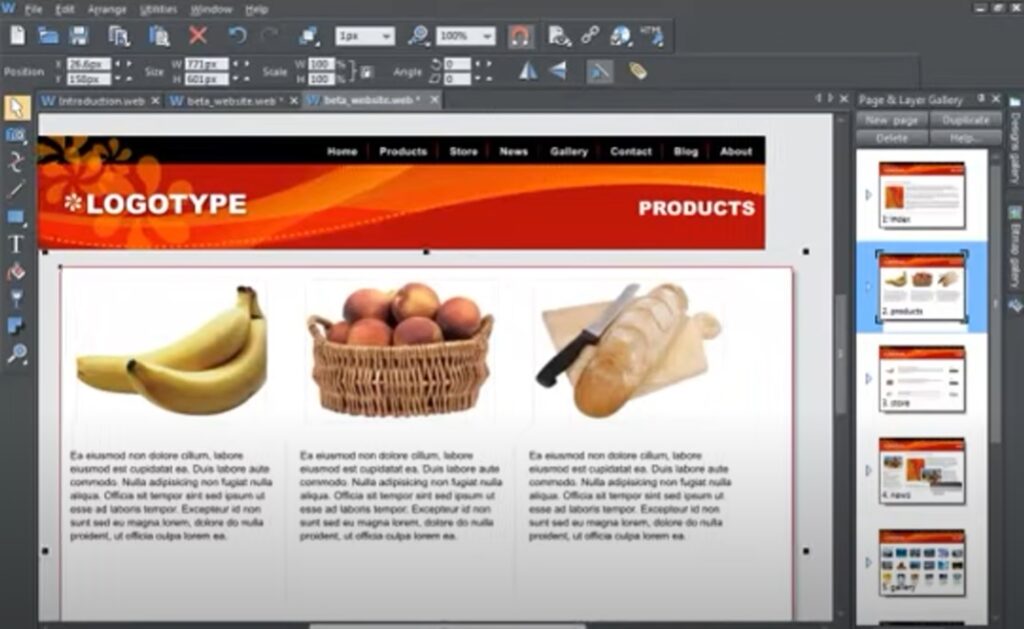
Step 4: Add Content
Once you have customized your template, it is time to add content to your website. This can include text, images, videos, and other multimedia elements. Xara Web Designer provides a variety of tools for adding and formatting content, making it easy to create engaging and visually appealing web pages.
Step 5: Add Interactivity
One of the strengths of Xara Web Designer is its ability to add interactivity to your website. For example, you can add buttons that link to other pages on your website, create image galleries, and add forms for collecting user information. Xara Web Designer provides an intuitive interface for adding interactivity to your website, making it easy to create engaging and interactive web pages.
Step 6: Preview and Publish Your Website
Once you have created your website, it is important to preview it to make sure everything looks and functions as intended. Xara Web Designer provides a built-in preview function that allows you to preview your website in a variety of formats, including desktop, tablet, and mobile devices. Once you are satisfied with your website, you can publish it to the web using Xara Web Designer’s built-in publishing tools.
Xara Web Designer is a powerful and intuitive web design software that makes it easy for users to create professional-quality websites without the need for coding. By following these six simple steps, you can create your own website using Xara Web Designer and take your online presence to the next level. Whether you are a beginner or an experienced designer, Xara Web Designer provides the tools and features you need to create engaging and visually appealing web pages that showcase your brand and connect with your audience. So why wait? Start using Xara Web Designer today and unleash your creativity on the web!